Mass Emailing with Lambda
A Guide with Lambda, SES, IAM and CloudWatch
I am a DevOps Engineer interested in gaining and sharing knowledge. Most interested in automation. Writing about DevOps tools and AWS.
Introduction
Orchestrating and automating mass emailing is crucial for businesses and organisations. In this article, we'' explore a robust solution using AWS Lambda, Simple Email Service (SES), Identity and Access Management (IAM), and CloudWatch. We'll delve into the unique use cases of each service and get straight into guiding you through the process of building a scalable, time-saving, and cost-effective mass emailing system.
The Lambda function will be written in Python language.
Prerequisites
You basically just need an AWS account.
Services
Lambda: handles email processing execution.
SES: Platform for email sending.
CloudWatch: Schedules send time for emails.
IAM: Controls access to AWS services
Architecture
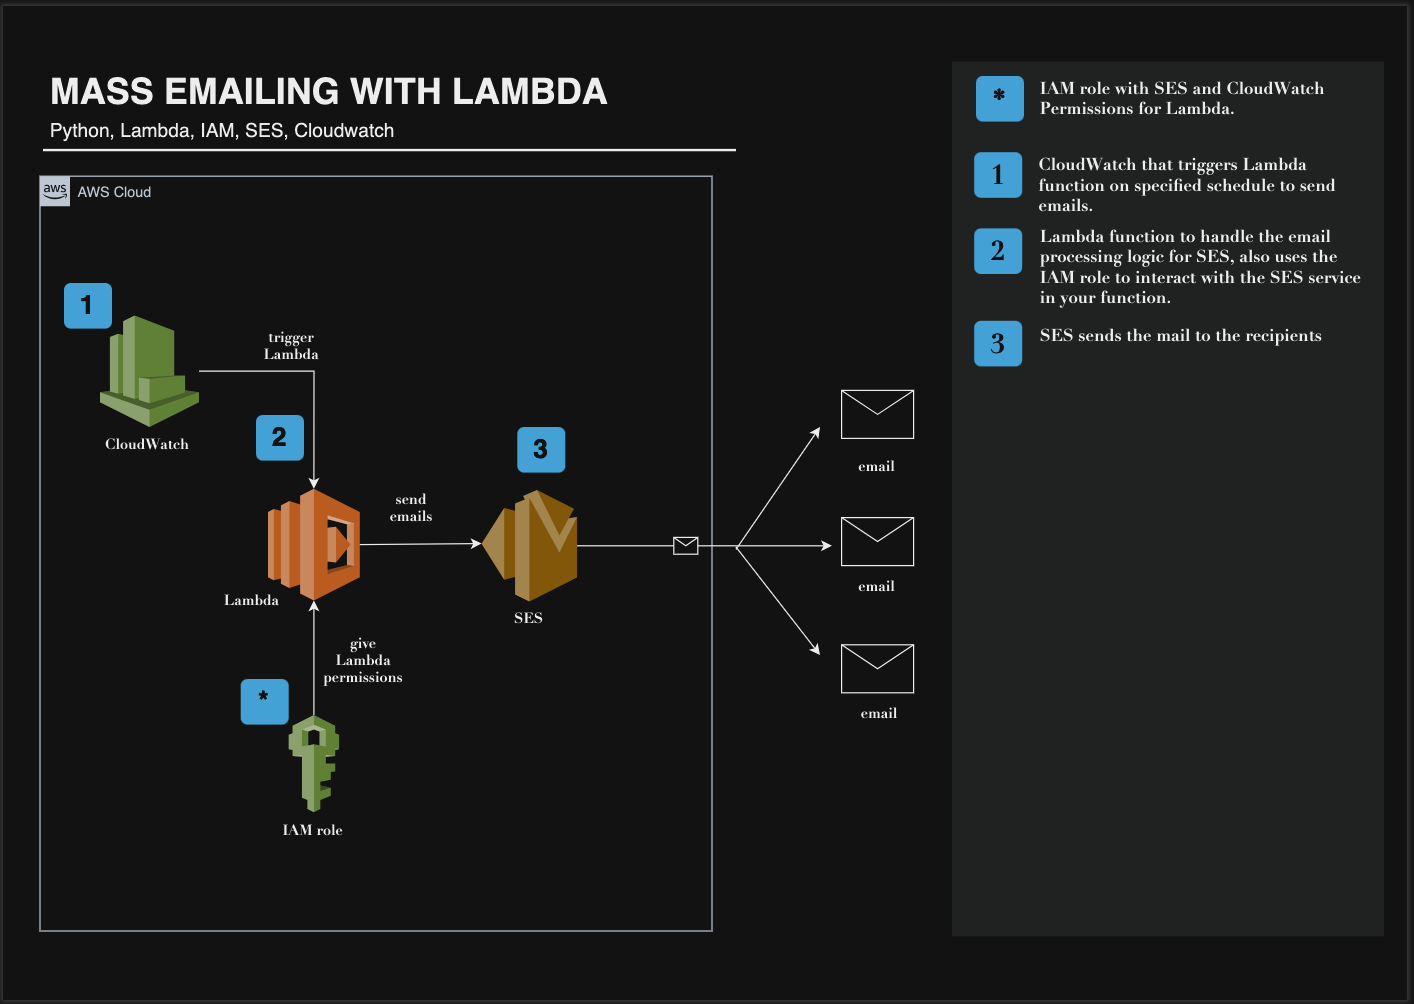
Steps
Mass emailing might seem like a complex concept that is unachievable, but it is actually the opposite. Just 5 easy steps and we're done.
1. Setup IAM role
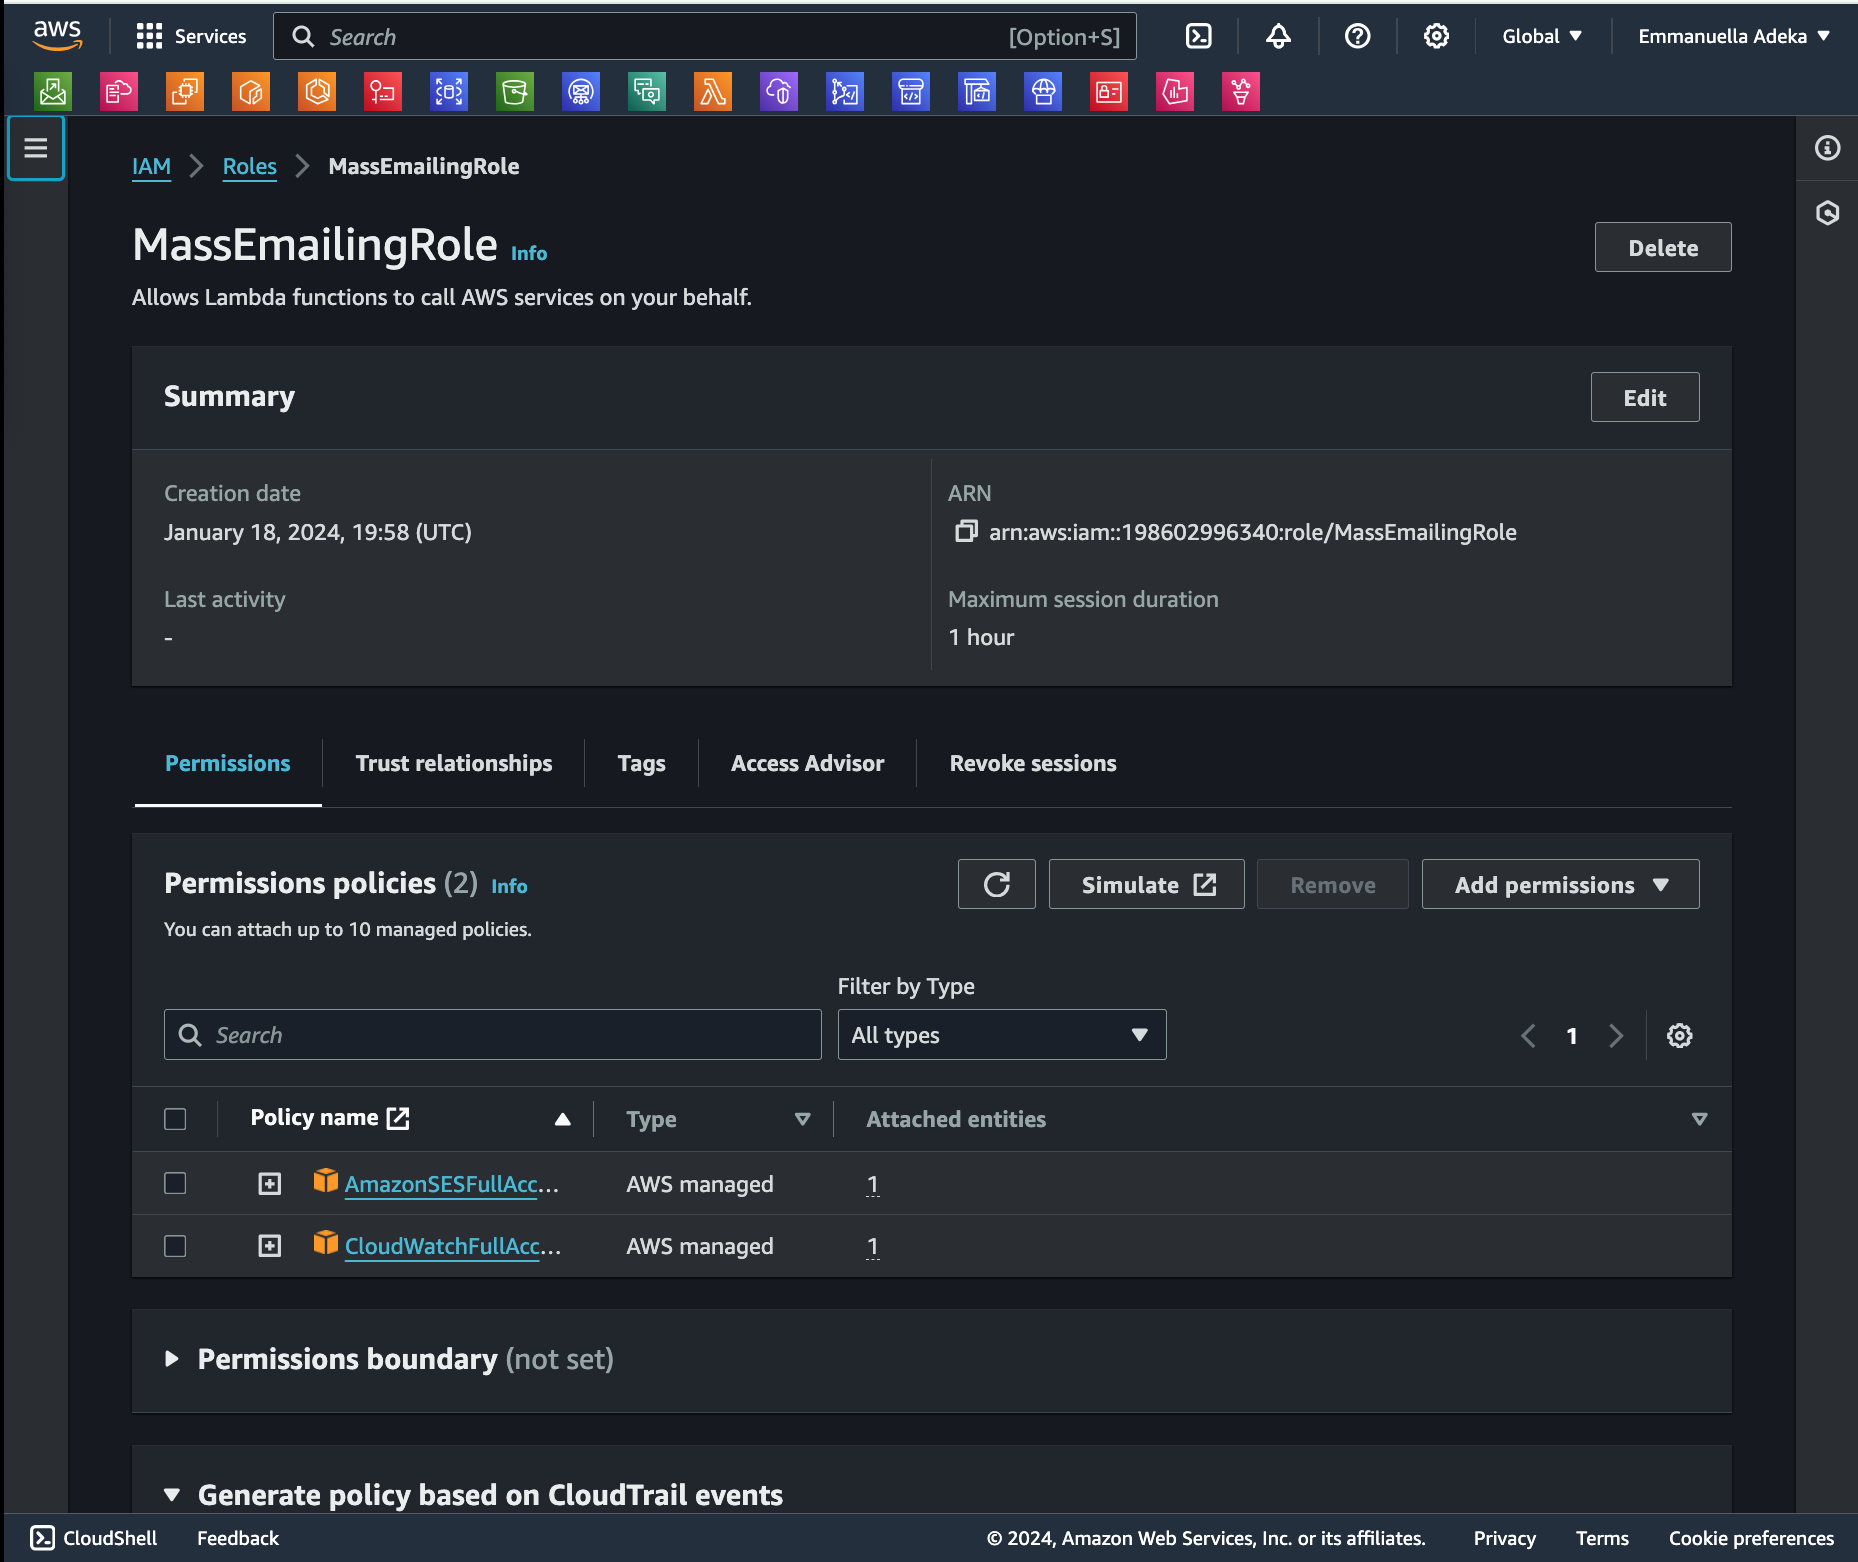
Create an IAM role with specific permissions to grant Lambda permission to interact with SES and CloudWatch for sending emails and scheduling send time.
Navigate to IAM and search for "Roles" in the side bar.
Click "Create role"
Leave Trusted entity type as "AWS service"
Choose "Lambda" as the service to give permission to Lambda to perform actions in your account.
Click "Next"
Add the following permissions:
CloudWatch - FullAccess (not V2)
SES - FullAccess
Click "Next"
Enter role name as "MassEmailingRole"
Review your configuration
Click "Create role"
2 Create a Lambda Function
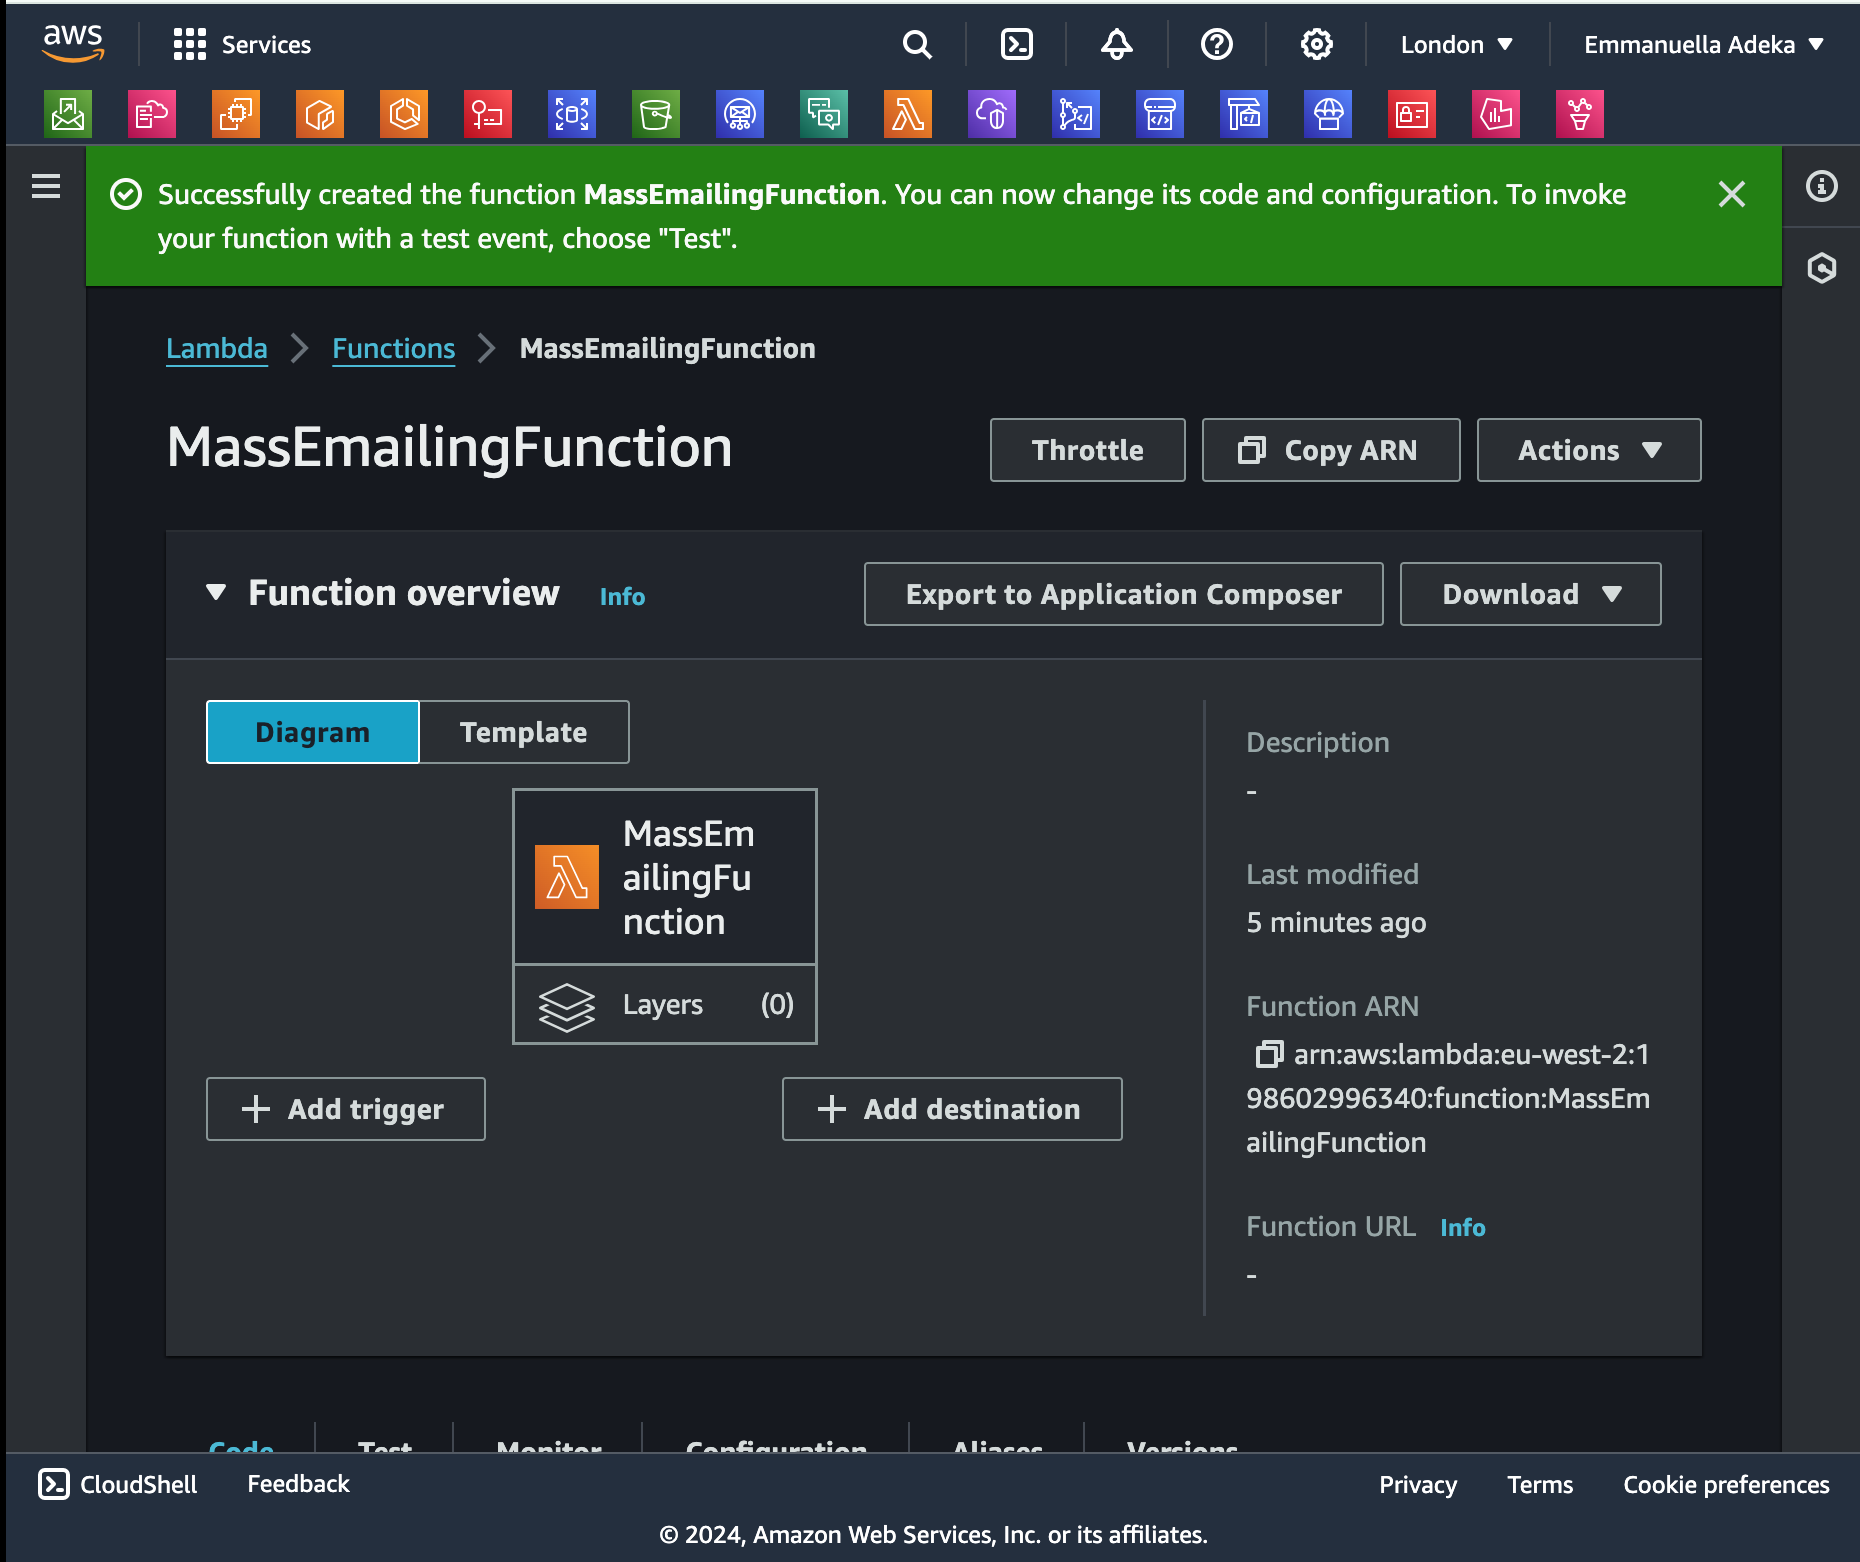
Create a Lambda function to handle the email processing logic, also use the created role to interact with the SES service in your function.
Navigate to Lambda in the management console.
Create function
Leave as "Author from scratch"
Enter function name as "MassEmailingFunction"
Choose the latest Python version as Runtime
Click on "Change default execution role" dropdown
Choose "Use an existing role"
Choose an existing role "MassEmailingRole"
Create Function
3 Configure SES
If you have already configured SES prior to this, feel free to skip this step
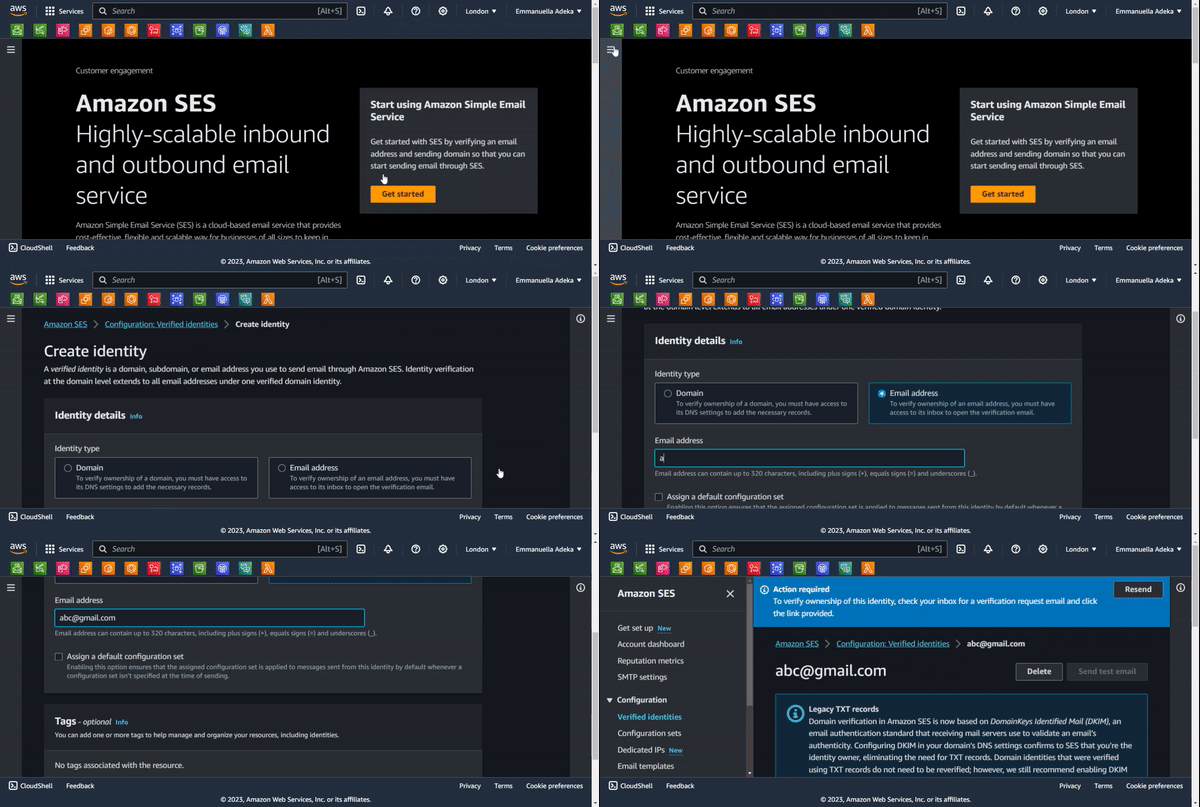
Navigate to SES in the Management Console
Create SMTP Credentials
Click SMTP Credentials
Create User (under smtp)
Retrieve SMTP credentials by downloading a .csv file or by copying the credentials and storing them in a file.
Click "Return to SES Console".
Click Verified Identities
Click "Create new identity"
Set identity type to "email"
Enter email address
Click "Create Identity"
To verify ownership of the identity, check the inbox of the email you entered.
Click the link in the email to verify the email address.
4 Configure the Lambda Function and Integrate with SES
Using Python
import boto3
import json

print("Loading Function...")

def lambda_handler(event, context):
    # Initialize the Simple Email Service (SES) client in the specified AWS region
    ses = boto3.client("ses", region_name="eu-west-2")

    # Define sender and recipient email addresses
    sender_email = 'abc@gmail.com'
    recipient_email = 'def@gmail.com'

    # Compose email subject and message
    subject = "Mass emailing with Lambda"
    message = "You are one of the many recipients of this email."

    # Send email with SES
    response = ses.send_email(
        Source=sender_email,
        Destination={'ToAddresses': [recipient_email]},
        Message={'Subject': {'Data': subject}, 'Body': {'Text': {'Data': message}}}
    )
    print(response)

    return {
        'statusCode': 200,
        'body': json.dumps({'message': 'Email sent succesfully!'})
    }
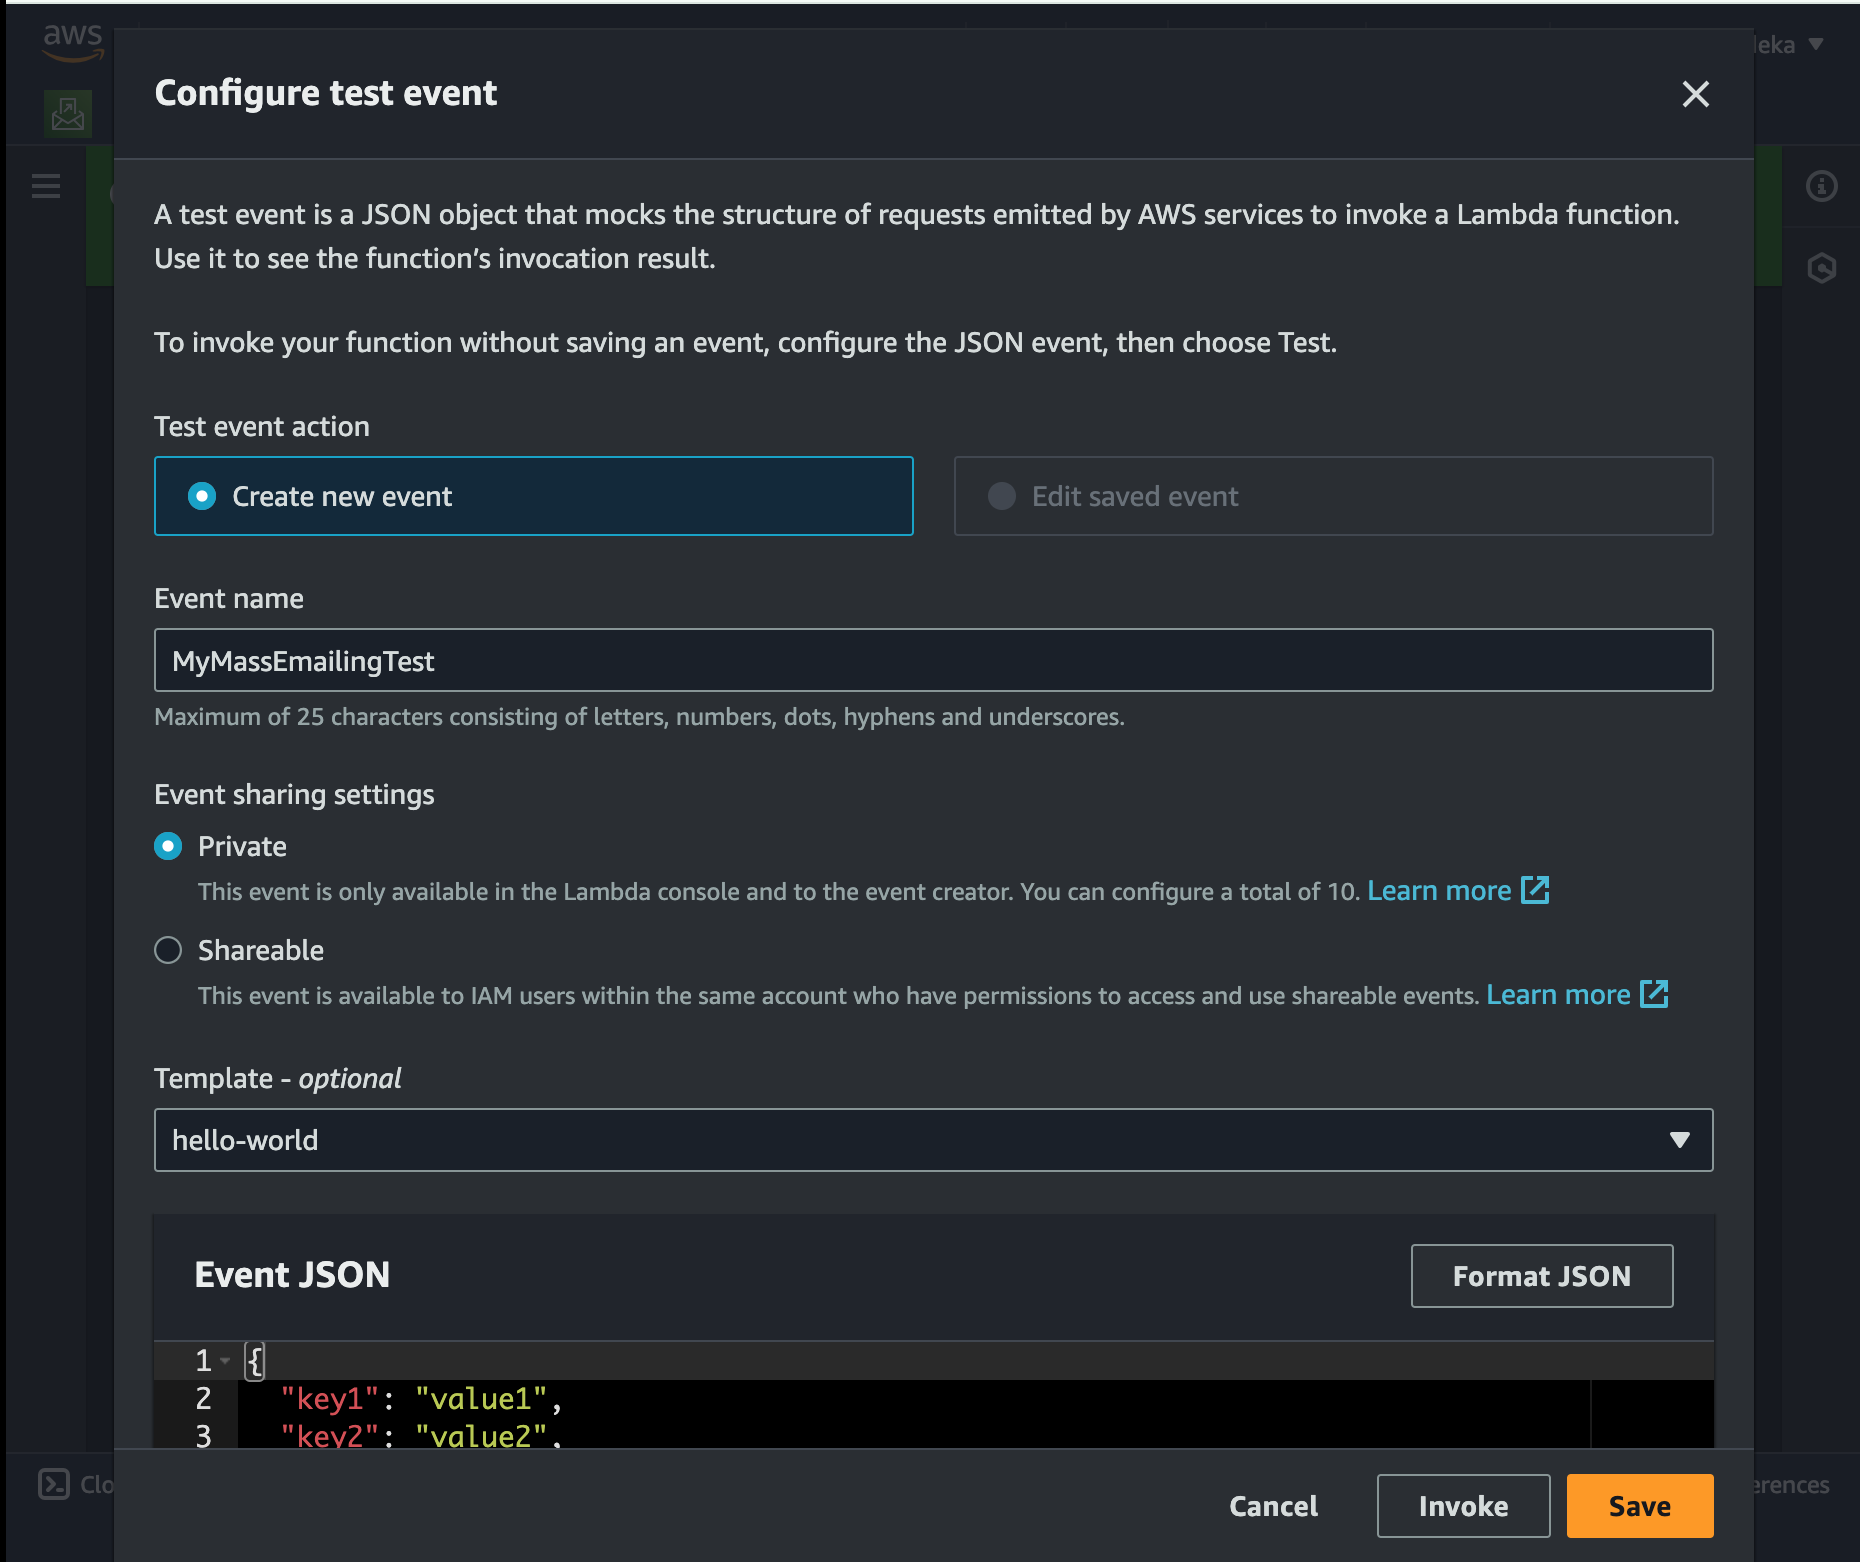
Configure test event
Set Event name as "MyMassEmailingTest"
Leave Event sharing settings as "Private"
Click "save"
Click "Deploy""
Click "Test"
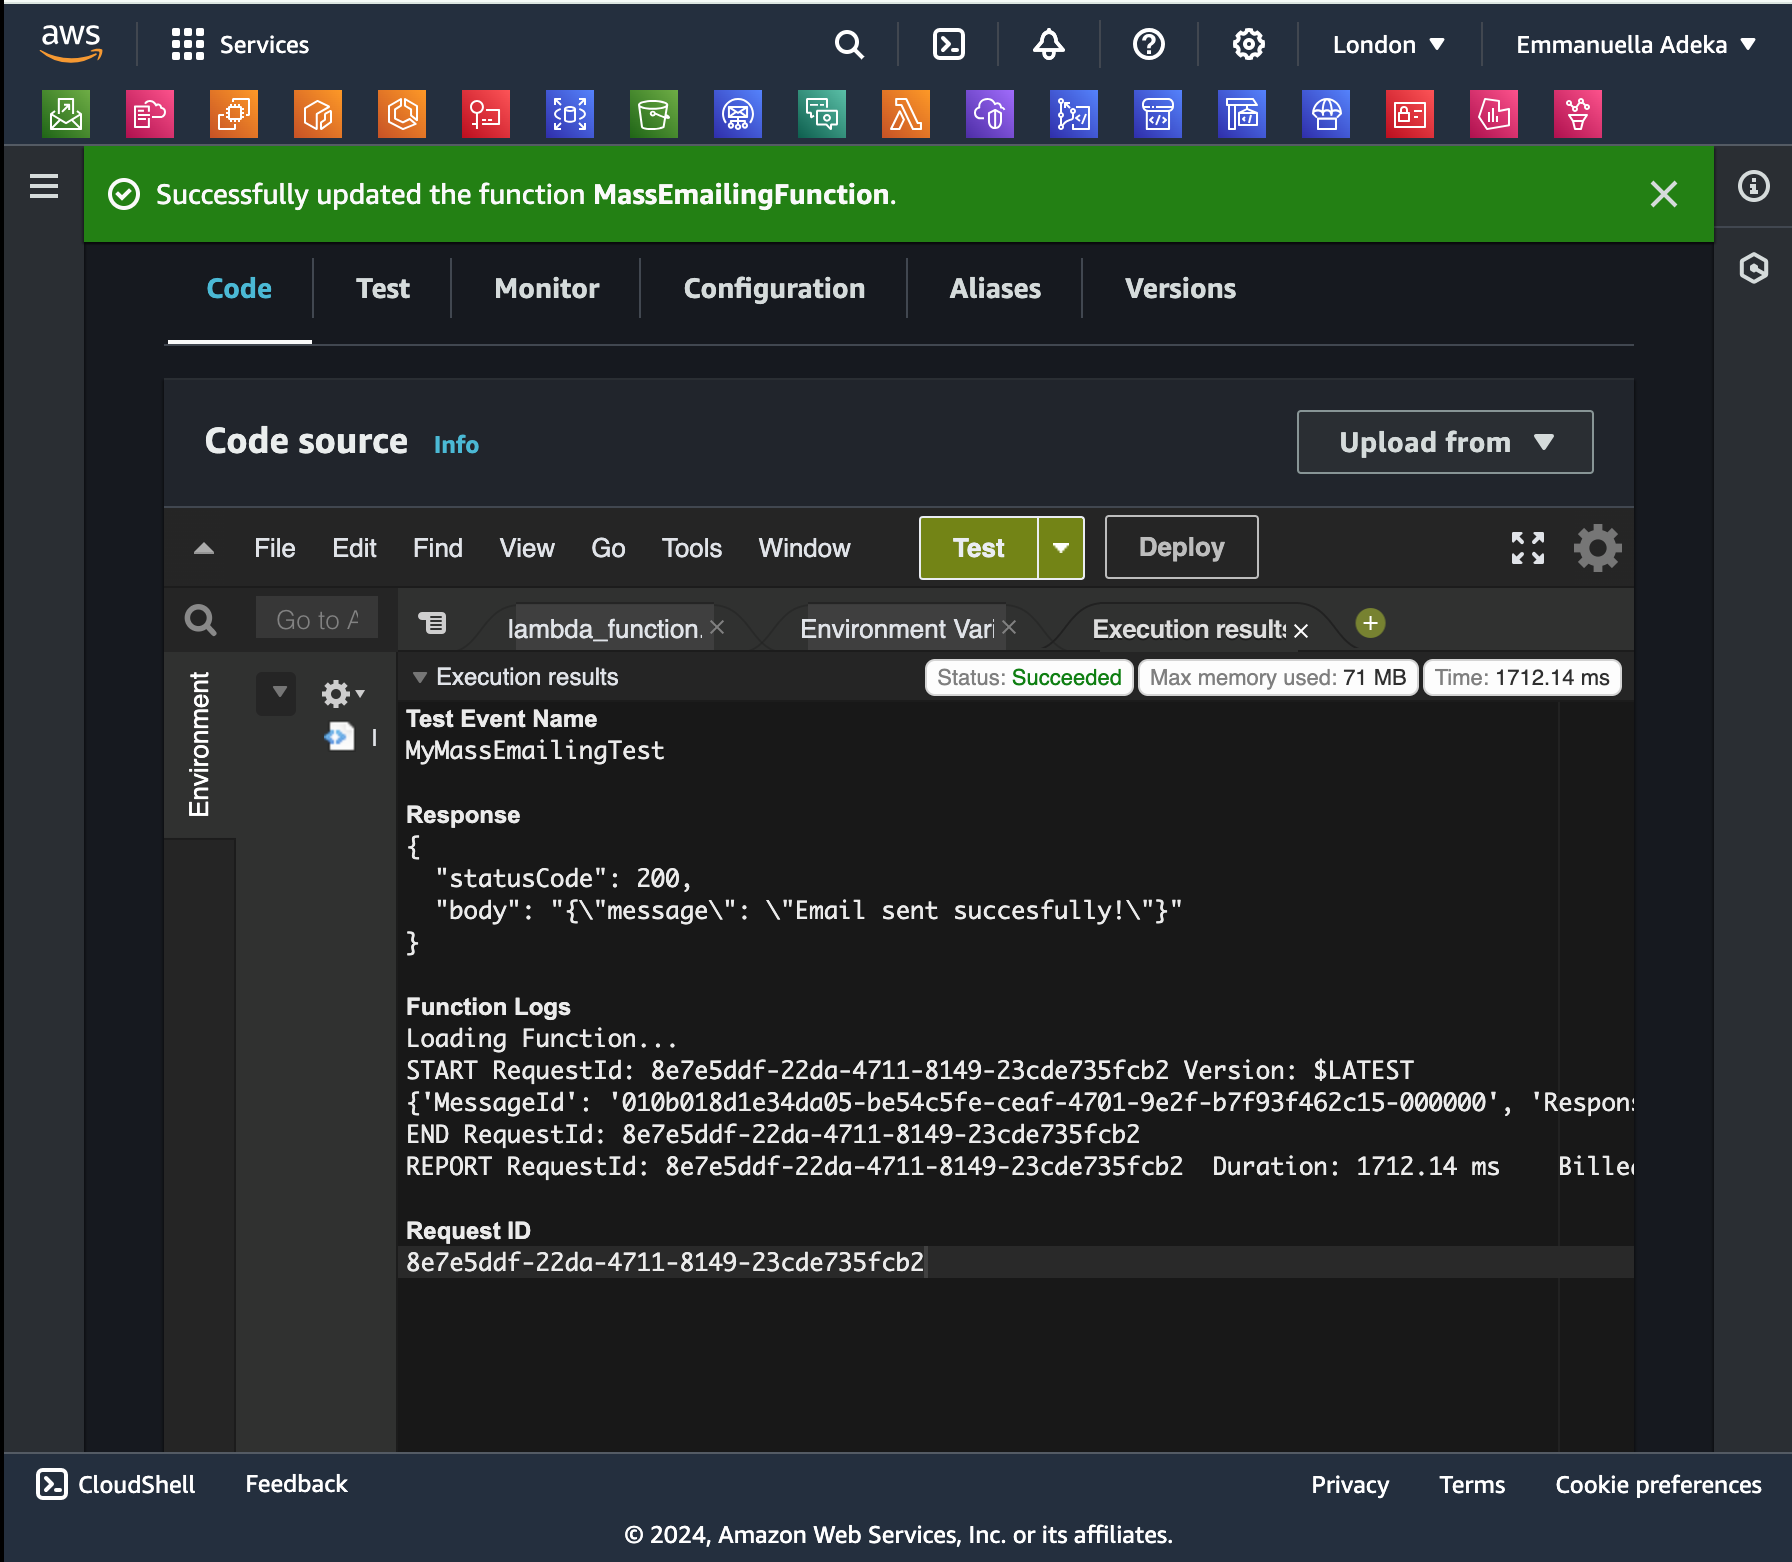
5 Create a CloudWatch Event
Navigate to CloudWatch > Events > Rules
Click "Create rule"
Enter rule name as "MassEmailingRule"
Choose "Rule type" as "Schedule"
Click on "Continue to create rule"
Choose "A schedule that runs at a regular rate, such as every 10 minutes."
Enter rate as 2 minutes
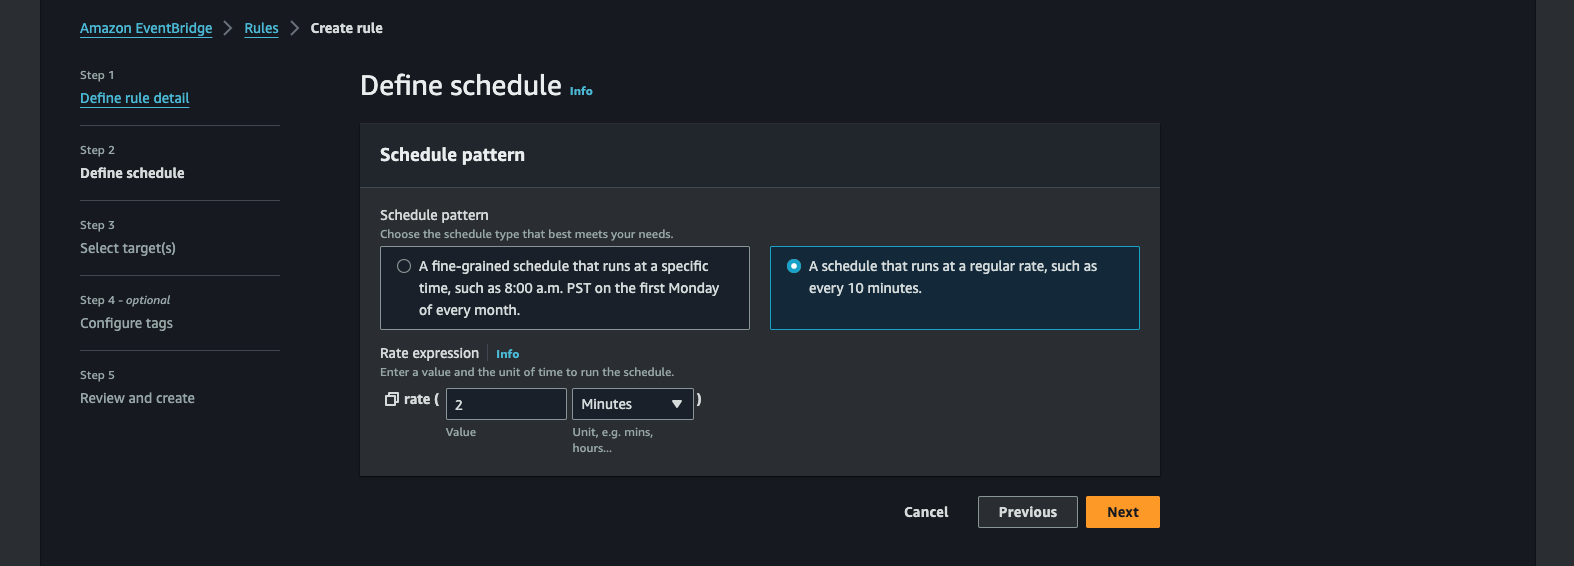
Click Next
select "target type" as lambda function
choose "MassEmailingFunction"
Click on Skip to review and create
Create Rule
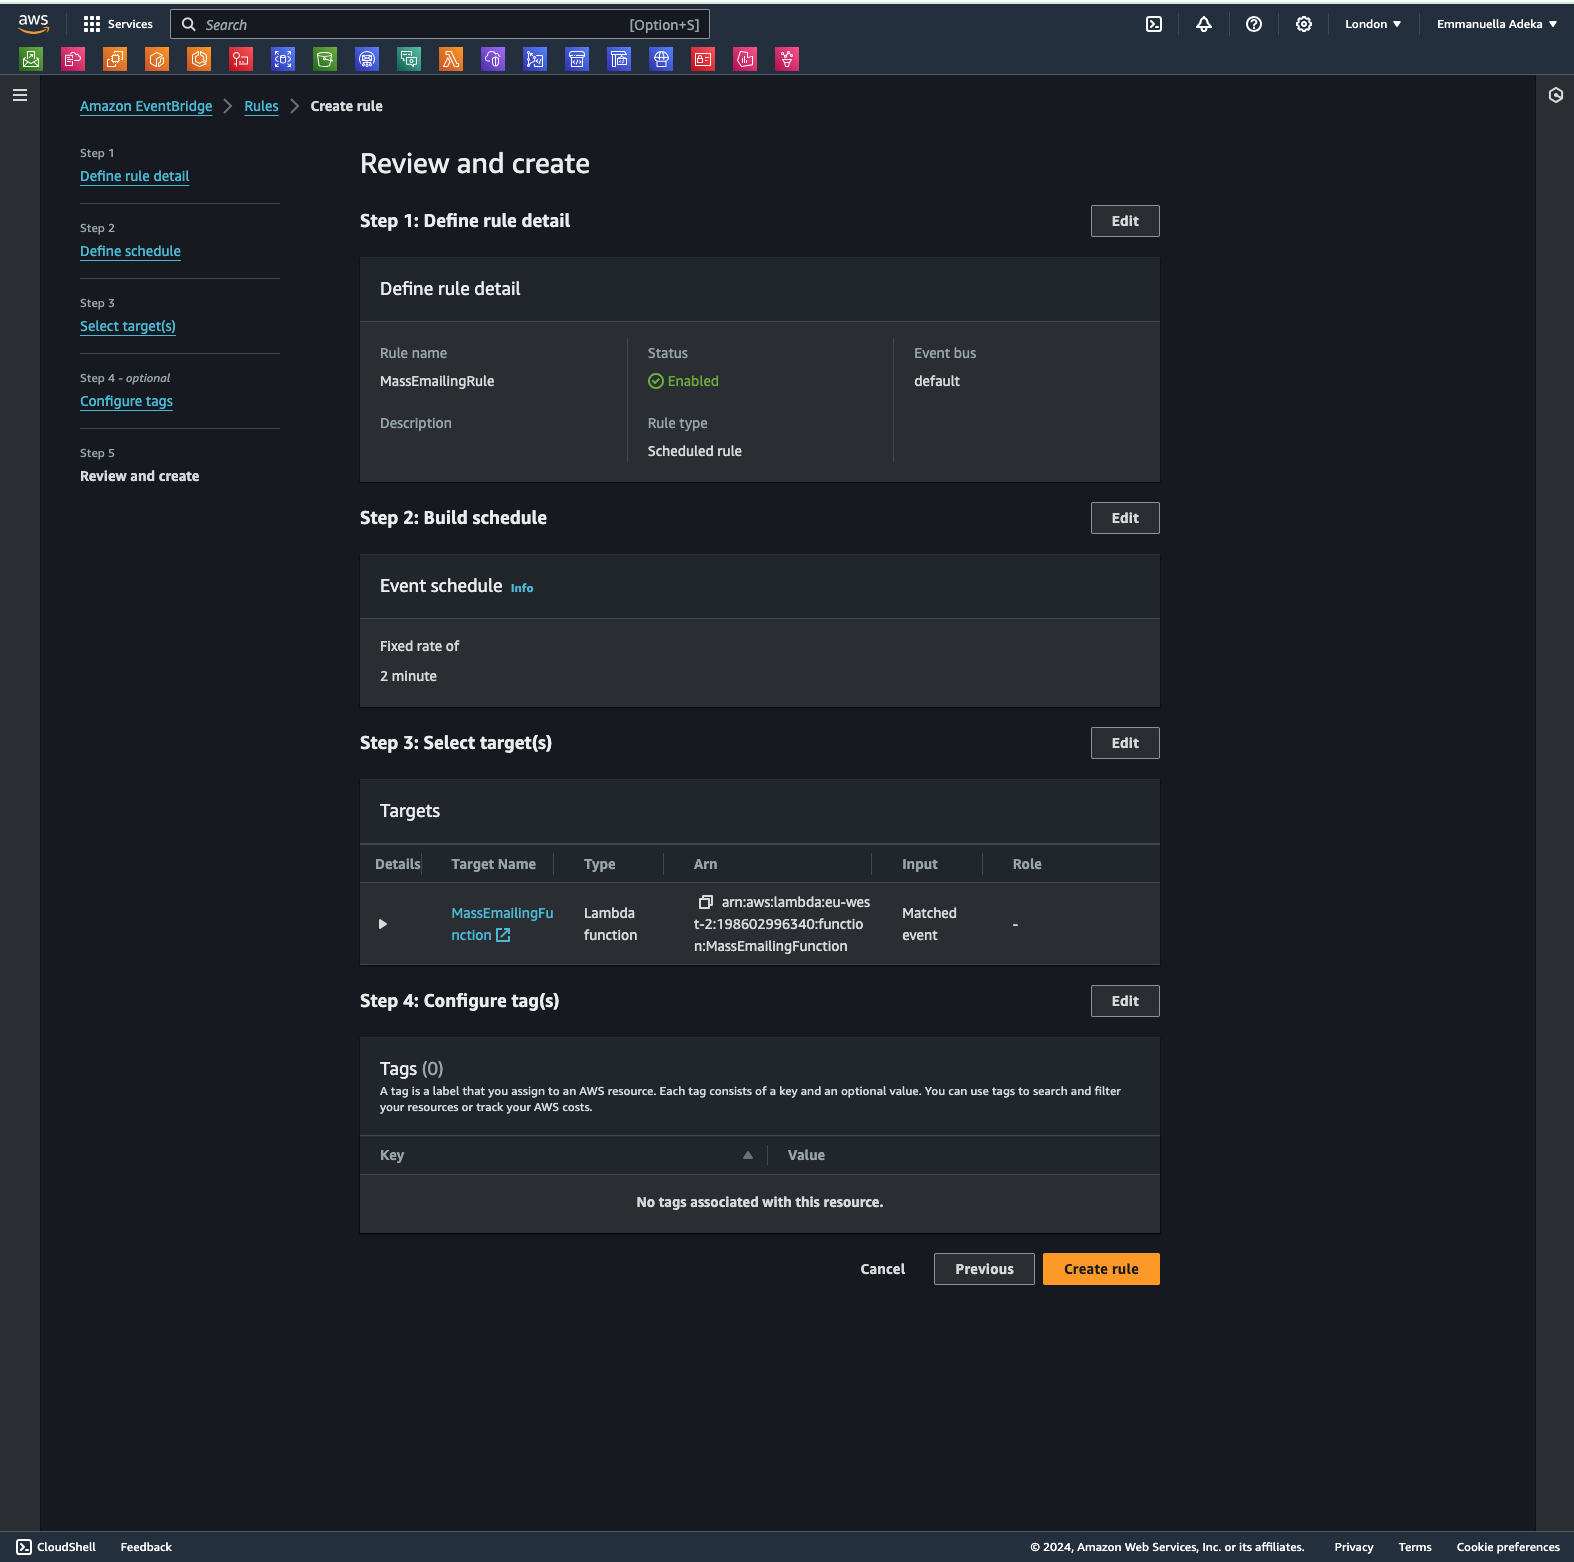
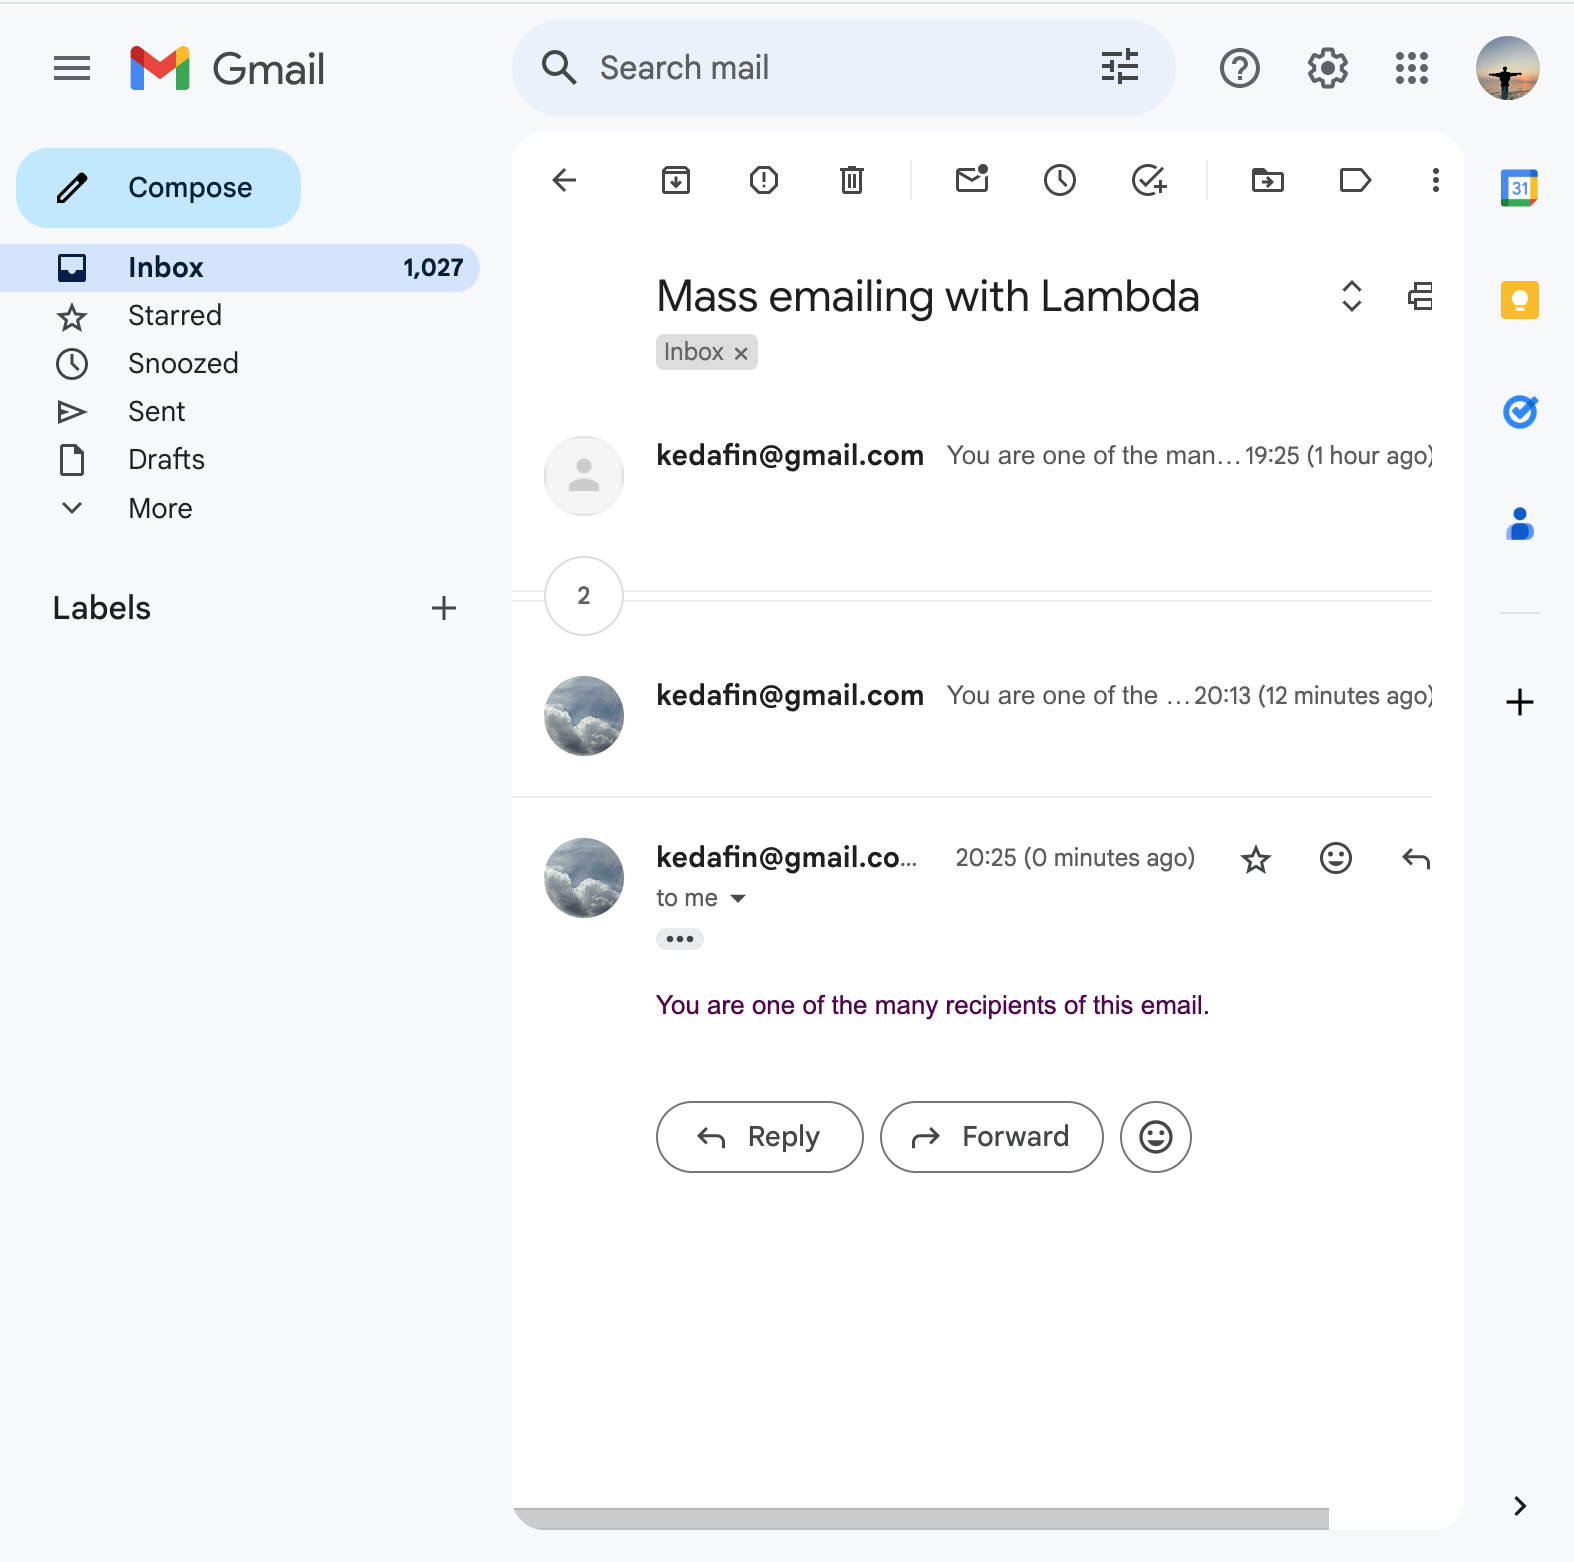
Check your mail!!
Conclusion
Leveraging all these services, we have built a scalable mass emailing system that ensure reliable communication with your audience. Several uses cases where mass emailing can be used include marketing campaigns, newsletters and updates, internal communications in large and small organisations, educational institutions and so on. It is important to understand the unique features of AWS service is important in your cloud journey as this project is not limited to just these 4 services, but can be optimised by adding more services (based on requirements) some of which include Amazon SQS (Simple Queue Service). Keep these insights in mind to create a robust solution that meets your demands.